Firstly if you haven't updated your firmware to version 1.02, I would advise you do so. Once I had done this I noticed a better all round response from the camera. JPEG from the camera was much better and this was just one of several small but noticeable improvements.
Once you have updated the firmware, and assuming you have checked it select "P" mode from the mode setting dial on top of your camera.
Next select "Menu OK" button from the back of the camera. This will take you to the setup screens.
Select the cameras Shooting settings first not the tool settings.
Select ISO and choose Auto ISO 400 from the ISO menu. (More about ISO settings later).
For Image size use L 4:3
For Image quality use F (fine)
Dynamic range is set to DR200
Fine-pix color is set to C (chrome)
The WB Fine Tune (White Balance is left at default.
Color is set to mid ( dont want over saturated images as a rule)
Tone is set to Hard
Sharpness is set to hard.
AE BKT EV Steps is set at +-1/3
Highspeed shooting should be on.
Next enter the Tools Setup and select IS Mode and set it to 2. The reason for this is that you only need Image Stabilization when you actually take a shot. This reduces battery drain.
Now that you have all that done every-time you take a photo using "P" mode the same settings will always be set. This gives a programmable auto shooting mode that you can vary unlike the cameras own auto mode which is not variable.
Of all the settings above probably the two most important settings are Tone and Sharpness. The tone gives you a contrasty look which makes any post processing easier. The Sharpness set to hard reduces the amount the camera applies in camera smoothing to the jpeg before out putting the file. You get a sharper but less noisy shot right from the camera.
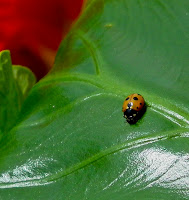
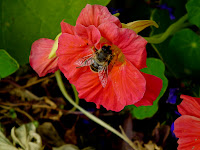
The images below of the Bee on the flower and the Lady bird
were shot in Macro mode using the camera with "P" mode. I haven't had to anything to the images apart from sizing them a little for use here. As you can see they are pretty well good to go as they are.


About ISO Settings (Auto).
When this is set as part of the "P" settings you will notice that the ISO setting for each shot may vary from ISO 100 to ISO 400 depending upon lighting condition. Depending on where you are an what the available light is like you can change this at any time. My on personal preference for all general shooting is ISO 200 (Not AUTO 200) as I want the camera to always shoot at this ISO. The camera will quite happily accommodate this.
 |
| Spot the Ladybird hiding on a stem |
If however I wish to shoot fast moving objects I may well choose a higher ISO setting or a Higher Auto ISO setting and let the camera decide.
However if your like me I like to shoot a good deal of my images in manual mode and I use a fixed ISO rather than a Auto ISO setting. I know this may sound a little hard to follow if new to the camera but after a while you develop a very good feel for the HS10. I personally like the amount of control I can have by using the camera this way. Others will find the the Auto or P modes are fine for what the want the camera to do.
One small item to watch as its easy to forget ( trust me I've done it ) is leave the White Balance set to Auto. For almost all occasions I have found that the camera is pretty good at getting it right or close to it for most shots. Happy snappin'
Not sure why but it would not allow me to change the following:
ReplyDeleteThe WB Fine Tune (White Balance is left at default.
Perhaps it was already left on default but then again it does not give me the option to change it.
If you use auto on the mode selector the camera runs the default setting. If you prefer to use P mode or Custom mode you set the WB fine tune to what you require. Make sure to set WB from the selector button bottom left to Auto and the camera will default to your personal settings.
ReplyDeleteYou can set up several custom profiles for different requirements.
I this has helped me a lot with my photography as i like to see what the camera can do so having more the one setting help me out i find that your way work a lot glad i come across it!
ReplyDeleteThe Fujifilm Hs 10 is still a amazing camera, the right pixelcount, flexibile and forgiving in practice.
DeleteSo we have to wait for hopefully the ideal marriage between Hs-30 and X-S1: back in size and weight like the HS-30 and high-end quality from the X-S1 !
And by the way: F 2.8 over the full focal range!
Delete